Baristas often disagree on the fundamentals of the perfect cup of coffee, some say it’s the fresh beans that play the biggest role, other argue that hand grinding makes the largest difference, many sustain that it is, in fact, the origin of the beans that really matters the most, and a few agree that there is an ideal temperature that improves the quality of the beverage. But, there is one thing they all agree on, one key ingredient, an indispensable element that must be present in any cup of coffee for it to be considered impeccable; good quality milk, Steam to perfection.
What Is Steamed Milk? And Why Is It So Important?
Before learning to steam milk you must first understand what it is and why it is so important. Steamed milk, also referred to as ‘microfoam’, or wet foam is the product of steaming milk(usually whole milk) with the wand of an espresso machine, causing the denaturation of its proteins. and so, making them pull gas to their surface and holding it in place, steamed milk has the characteristic of being an extremely fine foam with no visible bubbles. It is crucial in the preparation of a high quality and classy cup of coffee for two reasons; it’s tastier, or usually perceived as a more appetizing alternative to normal milk, mostly because of the altered properties of the milk at high temperatures. For example, the lactose it contains tends to be regarded as sweeter because it becomes more soluble, and it is crucial for lane art, which adds a layer of class and style to any cup of coffee. Now that you understand what microfoam is, let’s move on to making it.
How To Steam Milk?
We will now go over the process of steaming milk with an espresso machine, this procedure can be broken down into 4 stages, while you get ready to prepare your microfoam to keep in mind that making wet foam is not an exact science, it will require skill and practice, you might not get it the first time but with some patience the results will be amazing.
Step 1: Gathering your materials and preparing your work area
The very first thing you will want to do is to identify what kind of espresso machine you’re working with, find the steam wand, a curved, metallic rod with a small bulge on the tip, which tends to have one or several holes, or a wire mesh; it will have a pivot, usually covered with a black, plastic, accordion-shaped cylindrical piece similar to those present in automobile gear sticks, somewhere above it, or in the contiguous area, there will be a button, lever, or knob that activates the wand, having identified all these components we now move on to gathering the materials. The first thing you will need is, of course, the milk, for best results whole milk should be used, but half and half works well too, skim milk and low fat or lactose-free milk might not have the same volume and flavor. Next, you will need a pitcher, metal pitchers are commonly used and tend to work best, plastic pitchers ought to be avoided, make sure both the milk and the pitcher are cold.
Step 2: Measuring the amount of milk
Even though it sounds simple, measuring the amount of milk you will use is a delicate process, using to much milk will make it harder to steam and might scorch the cream or create too many bubbles. If you use too little it might be excessively thin, and not be enough to make more than a cup, usually, you will want to fill the pitcher up to about the center.
Step 3: Stretching the milk and forming whirlpools
Now we move into the actual foaming of the milk, this is divided into two steps, stretching and spinning. Before you start stretching you must ‘purge’ the wand, this means cleaning it, by turning it on, letting steam race out and wiping it, to get rid of milk or particles that might be trapped inside, now we start stretching, during this step the wand is introduced just under the surface of the milk, microfoam is formed, be careful to let the milk spin while you do this, it should take about 4 seconds, you should hear a hissing sound. When the microfoam has been created its time to spin the milk, for this step you must sink the wand slightly further down into the pitcher, tilt the pitcher slightly to one side, and let the milk whirlpool, keep the whirlpool going until the pitcher heats up and you are only barely able to hold it without burning yourself.
 Step 4: Resting the milk
Now that your steamed milk is done all that is left for you to do it does disperse any bubbles that may have formed by gently tapping the pitcher with a spoon or other similar implement, and to swirl the milk around, in order to polish the milk. Be sure to clean the wand and the espresso machine when you’re done.
Step 5: Maintenance
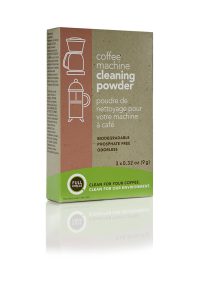
Finally, you are going to want to clean the steam wand fairly regularly. There are a bunch of different products that make this very easy. Click here to see these on Amazon.
Now that you know the basics of steaming milk using espresso machines, all that is left for you to do is practice, remember to follow up with a great coffee to use your deluxe foam on.
